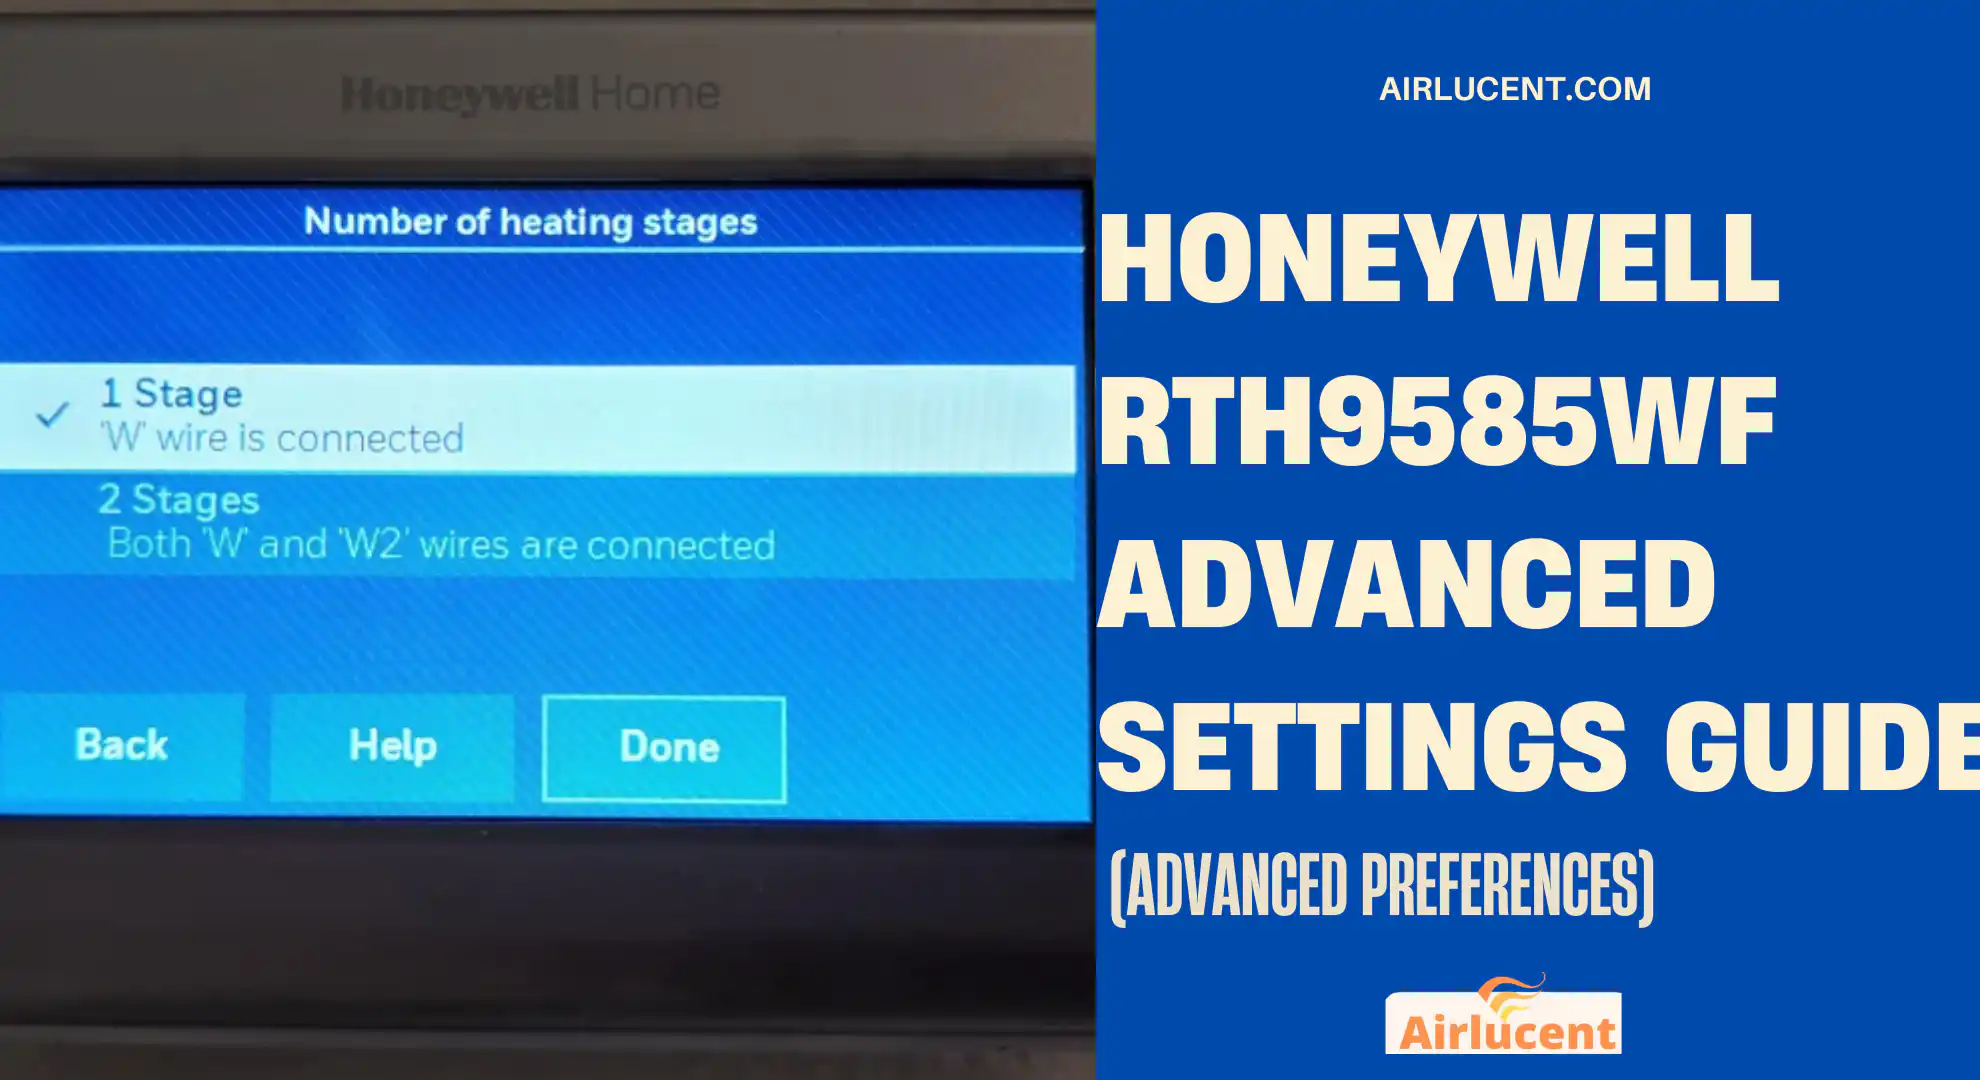
I’m Nathan, and I’ve worked as an HVAC technician for over 10 years. I’ve installed and serviced a lot of Honeywell Wi-Fi thermostats, including the RTH9585WF. Most homeowners never touch the advanced settings, but when your comfort feels “off” or the system seems to run at the wrong times, Advanced Preferences is often where the fix lives.
In this guide, I’m going to walk you through exactly how to get into the Honeywell RTH9585WF advanced settings, what each setting actually does in real-life HVAC terms, and what I typically recommend in the field for comfort, equipment protection, and energy savings.
Quick safety note (from experience)
Before changing anything:
- Take photos of every Advanced Preferences screen so you can revert easily.
- Change one setting at a time, then run the system for a day.
- If you’re unsure of your HVAC type (heat pump vs furnace), do not guess. Some setup items belong in Installer Setup, not Advanced Preferences.
How to access Advanced Preferences on the RTH9585WF
- From the thermostat home screen, tap Settings (top of the screen)
- Tap Preferences
- Tap Advanced Preferences
- Use the on-screen arrows to move through the configuration screens and adjust values
That’s the menu path homeowners use most often. (There is also an Installer Setup area for wiring and system type configuration, but this article focuses on Advanced Preferences as you requested.)
Advanced Preferences at a glance (what you can change)
Here’s a quick reference table of the most commonly adjusted items I see homeowners benefit from.
Table: Common Honeywell RTH9585WF Advanced Preferences
| Setting | What it affects | Good reason to change it | My typical recommendation |
|---|---|---|---|
| System Type (Programmable vs Non-Programmable) | Whether schedules control temps | You want a fixed temp or you hate schedules | Most homeowners: Programmable |
| Auto Changeover | Auto switching between heat and cool | Spring/fall comfort without manual switching | Use it only if you set a proper deadband |
| Heat/Cool Changeover Separation (deadband) | Prevents rapid switching | System keeps bouncing between heat/cool | Minimum 3°F, often 3 to 5°F |
| Smart Response Technology | Learns run time to hit schedule temp on time | You want comfort exactly at schedule times | On for most people |
| Temperature Limits (Min Cool / Max Heat) | Prevents extreme setpoints | Kids, guests, rentals, energy control | Set realistic boundaries |
| Temperature Calibration (offset) | Align thermostat reading to actual room temp | Thermostat reads wrong vs reliable thermometer | Adjust only after verifying with a good sensor |
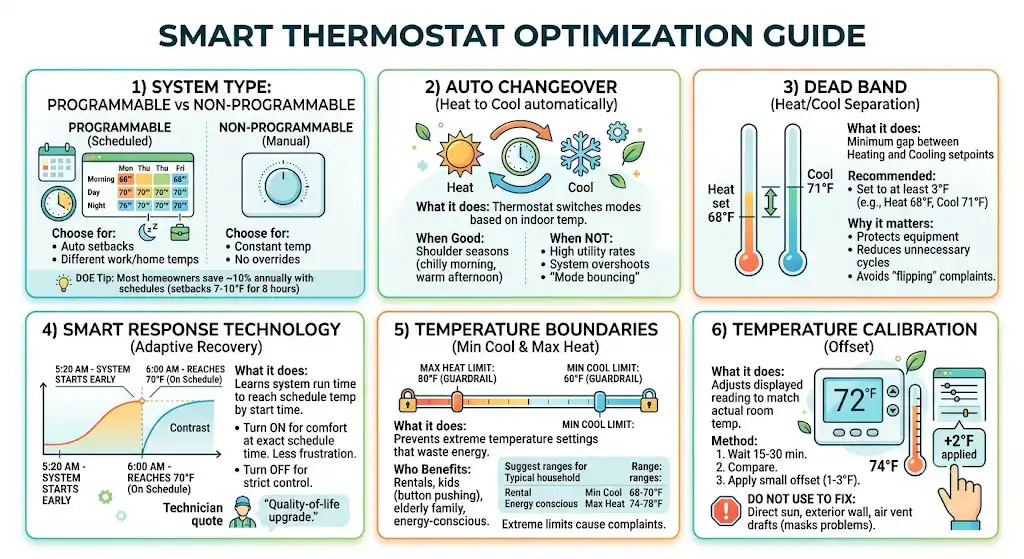
1) System Type: Programmable vs Non-Programmable
What it does
This controls whether your thermostat uses scheduled temperature changes (programmable) or functions more like a manual thermostat (non-programmable).
When you should switch it
- Choose Programmable if you want:
- Automatic setbacks at night
- Different temps for work hours vs home hours
- Choose Non-Programmable if you want:
- A single constant temperature most of the time
- No schedule overrides or time-based changes
My real-world advice
Most homeowners save money with schedules if they stick to them.
A commonly cited benchmark from the U.S. Department of Energy is that setting back 7 to 10°F for 8 hours a day can save around 10 percent per year on heating and cooling costs (actual results vary by climate, insulation, and equipment). If you’re not using a schedule at all, you’re leaving that opportunity on the table.
2) Auto Changeover (Heat to Cool and Cool to Heat automatically)
What it does
Auto changeover lets the thermostat switch between heating and cooling based on indoor temperature. It’s useful during shoulder seasons when mornings are chilly and afternoons are warm.
When Auto Changeover is a good idea
- You live in a climate where it’s common to need heat in the morning and A/C later the same day
- You’re tired of manually switching from Heat to Cool mode
When I recommend NOT using it
- You have high utility rates and you prefer strict control
- Your system tends to overshoot temperatures
- Someone in the home keeps changing setpoints constantly (this causes mode bouncing)
3) Heat/Cool Changeover Separation (Deadband) and why 3°F matters
What it does
This is one of the most important comfort and equipment-protection settings.
The changeover separation (also called deadband) is the minimum gap between your heating setpoint and your cooling setpoint when Auto Changeover is enabled.
If your deadband is too tight, your thermostat can call for heat and then cooling soon after. That’s uncomfortable and hard on equipment.
Recommended setting
- Set it to at least 3°F
- In many homes, 3 to 5°F feels better and reduces unnecessary cycles
Example (easy way to set it correctly)
If you set:
- Heat to 68°F
Then set: - Cool to 71°F or higher (3°F separation minimum)
What I see in the field
Most “my system keeps flipping between heat and cool” complaints come down to:
- Auto changeover turned on
- Deadband too small
- People nudging setpoints all day
4) Smart Response Technology (adaptive recovery)
What it does
Smart Response learns how long your system takes to heat or cool your home. Then it starts early so your home reaches the scheduled temperature by the time the schedule starts.
So if your schedule says 6:00 AM to 70°F, Smart Response might start at 5:20 AM if that’s what it takes.
Turn it ON if you want:
- Comfort at the exact schedule time
- Less “it’s still cold at 6 AM” frustration
Turn it OFF if you want:
- The system to start exactly at the scheduled time (no early start)
- Very strict control (common for some commercial-like routines)
My technician take
For most homeowners, Smart Response is a quality-of-life upgrade. People often think their thermostat is “not following the schedule” when it starts early, but it’s actually doing the job correctly.
5) Temperature boundaries (Minimum Cool Limit and Maximum Heat Limit)
What it does
Temperature limits prevent someone from setting extreme temperatures that waste energy or stress equipment.
Your source values are common examples:
- Minimum Cool Limit: 60°F
- Maximum Heat Limit: 80°F
Those are reasonable guardrails for many homes, but you can tailor them.
Who benefits most from limits
- Homes with kids (constant button pushing)
- Rentals and guest houses
- Households trying to control energy bills
- Anyone caring for elderly family where safety matters
Practical recommendations I use
This is not one-size-fits-all, but here are ranges that typically make sense:
| Home situation | Suggested Min Cool | Suggested Max Heat |
|---|---|---|
| Typical household | 68 to 70°F | 74 to 78°F |
| Rental property | 70 to 74°F | 72 to 76°F |
| Energy-conscious (still reasonable) | 72 to 75°F | 68 to 72°F |
Note: Extreme limits can cause comfort complaints fast. If you set boundaries too tight, people will fight the thermostat and override schedules constantly.
6) Temperature calibration (offset)
What it does
Calibration lets you adjust the thermostat reading up or down if the displayed temperature does not match actual room temperature.
Example:
- Thermostat reads 72°F
- Reliable thermometer at the thermostat location reads 74°F
You might apply a +2°F or -2°F offset depending on how the RTH9585WF displays and how the option is labeled.
My step-by-step method (the right way)
- Put a reliable thermometer near the thermostat (not in direct sun, not over a vent)
- Wait 15 to 30 minutes
- Compare readings
- If the difference is consistent, apply a small offset (usually 1 to 3 degrees)
What not to do
Do not use calibration to fix:
- A thermostat mounted on an exterior wall
- A thermostat getting hit by supply air
- A thermostat in direct sunlight
- Poor airflow or closed registers
In those cases, calibration masks the problem instead of fixing it.
Recommended “best settings” setup (most homes)
If you want a solid baseline that works well in many normal residential setups:
Table: My baseline Advanced Preferences configuration
| Preference | Recommended baseline |
|---|---|
| Programmable vs Non-Programmable | Programmable |
| Auto Changeover | Off unless you truly need it |
| Changeover Separation | 3°F minimum, 4°F if you notice mode bouncing |
| Smart Response Technology | On |
| Min Cool Limit | 68 to 70°F (or higher if energy-focused) |
| Max Heat Limit | 76 to 78°F (or lower if energy-focused) |
| Temperature Calibration | 0° unless verified with a thermometer |
If you tell me your system type and what problem you’re trying to solve (runs too much, uneven temps, short cycling), I can tighten these recommendations.
Common issues I see and the Advanced Preference that fixes it
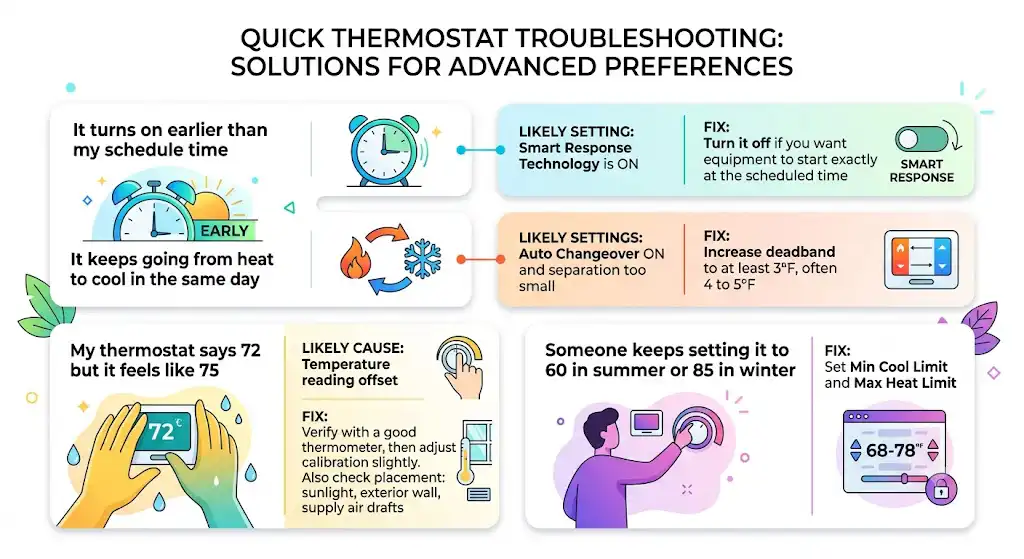
Problem: “It turns on earlier than my schedule time”
- Likely setting: Smart Response Technology is ON
- Fix: Turn it off if you want the equipment to start exactly at the scheduled time
Problem: “It keeps going from heat to cool in the same day”
- Likely settings: Auto Changeover ON and separation too small
- Fix: Increase deadband to at least 3°F, often 4 to 5°F
Problem: “My thermostat says 72 but it feels like 75”
- Likely cause: Temperature reading offset
- Fix: Verify with a good thermometer, then adjust calibration slightly
- Also check placement: sunlight, exterior wall, supply air drafts
Problem: “Someone keeps setting it to 60 in summer or 85 in winter”
- Fix: Set Min Cool Limit and Max Heat Limit
Pro tips from my 10 years in HVAC (small changes that matter)
Use the schedule to avoid peak runtime
If your utility rates are higher late afternoon, avoid aggressive cooling changes right at peak hours. Let the house coast a bit.
Don’t chase the temperature
Constantly adjusting 1 degree up and down can create more runtime and discomfort than letting the system stabilize.
If your home is humid
The RTH9585WF can’t fix humidity by itself if the equipment isn’t designed for it. If humidity is your main complaint, the right fix might be:
- Fan settings
- A dehumidifier
- Equipment airflow adjustments (professional)
- Duct improvements
When Advanced Preferences is not enough (and you should stop)
If you run into any of the below, you may be in Installer Setup territory or dealing with a system issue:
- The thermostat is calling for heat but cool comes on (or vice versa)
- Short cycling continues even with reasonable deadband
- You’re not sure whether you have a heat pump, dual fuel, or conventional system
- System runs but temperature barely changes (could be refrigerant, airflow, filter, coil, burner issues)
That’s when I recommend bringing in a technician, because incorrect configuration can cause expensive comfort problems and, in some cases, equipment wear.
FAQs
What is the best deadband for Auto Changeover?
Minimum 3°F. If your system seems “busy” or you notice back-to-back mode changes, go to 4 or 5°F.
Does Smart Response save energy?
It’s mainly a comfort feature. It can reduce “overshoot” in some setups, but the main energy savings typically come from smart scheduling and reasonable setpoints.
How do I reset Advanced Preferences if I mess something up?
The safest method is to use the photos you took and set them back manually. If you truly need a reset, the thermostat supports a factory reset process, but it can also wipe Wi-Fi and other customizations. I only use factory reset as a last resort.