I’m Nathan. I’ve worked as an HVAC technician for over 10 years, and I’ve helped a lot of homeowners deal with “smart thermostat leftovers” after buying a house or installing a used thermostat.
If your Nest thermostat is still tied to the previous owner, it can block setup in the app, keep weird schedules, or show features you can’t control. The good news is you can usually fix this in 10 to 20 minutes.
Below is the exact process I use in the field, plus the common roadblocks (PIN locks, “already linked” messages, and app confusion).
Why this happens (and what “ownership” really means)
With Nest, there are two different things people mix up:
- Local settings on the thermostat (schedule, Eco temps, Wi-Fi name, etc.)
- Cloud ownership (the device being linked to someone’s Google or Nest account)
Before you start (2 minutes of prep that saves headaches)
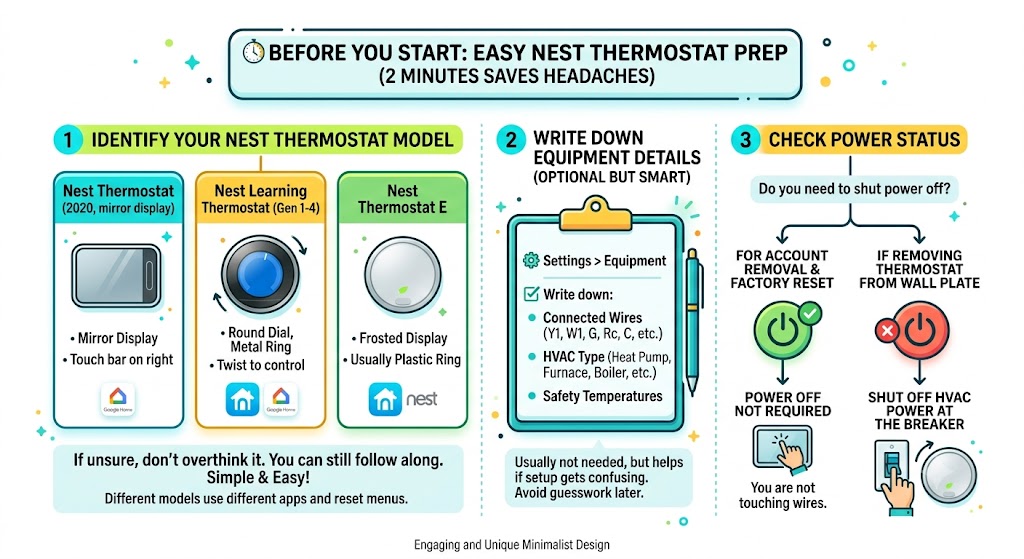
1) Identify which Nest thermostat you have
Different models use different apps and reset menus.
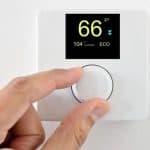
| Nest Thermostat (2020, mirror display) | Touch bar on right side, reflective front | Google Home app |
| Nest Learning Thermostat (Gen 1 to 4) | Round dial, metal ring, twist to control | Nest app (also works with Google Home for basic control) |
| Nest Thermostat E | Round, more “frosted” display, usually plastic ring | Nest app |
If you’re not sure, don’t overthink it. You can still follow the steps below.
2) If you can, write down equipment details first (optional but smart)
In my HVAC work, I like to avoid guesswork later.
On many Nest models you can check:
- Settings
- Equipment
Write down:
- Which wires are connected (Y1, W1, G, Rc, C, etc)
- Whether you have a heat pump, furnace, boiler, and so on
- Any Safety Temperature settings
You usually won’t need this, but it helps if the setup gets confusing after the reset.
3) You usually do not need to shut the power off
For account removal and factory reset, you’re not touching wires. So power off is not required.
If you do end up removing the thermostat from the wall plate for any reason, then shut off your HVAC power at the breaker.
Best method (recommended): remove the thermostat from the previous owner’s account first
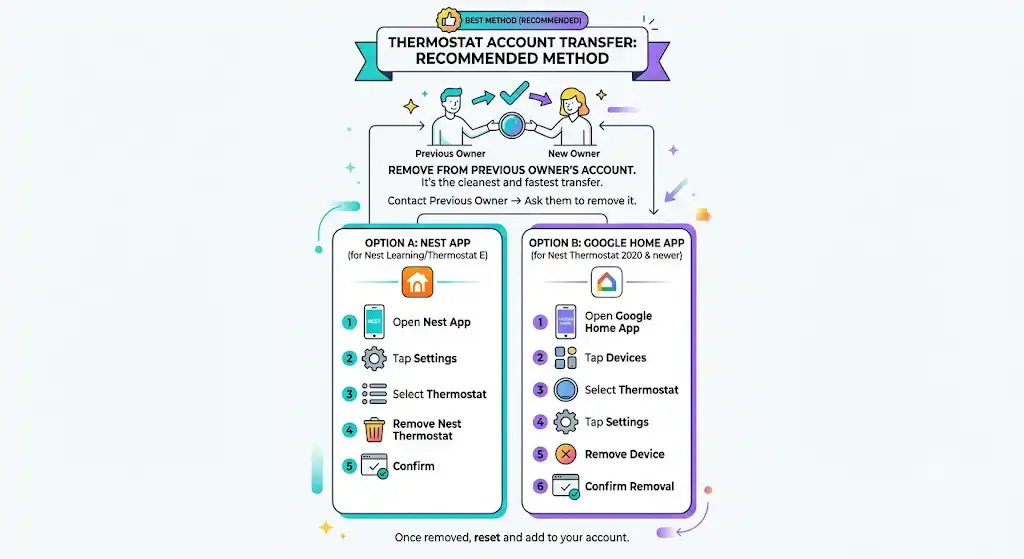
If you can contact the previous owner, this is the cleanest and fastest transfer. Ask them to remove the thermostat from their app.
Option A: The previous owner removes it in the Nest app (Nest Learning Thermostat / Thermostat E)
Have them do this:
- Open the Nest app.
- Tap the Settings icon.
- Select the thermostat.
- Scroll down and tap Remove thermostat (or Remove Nest Thermostat).
- Confirm.
Once they do that, you can reset and add it to your account.
Option B: The previous owner removes it in the Google Home app (Nest Thermostat 2020 and many newer setups)
Have them do this:
- Open the Google Home app.
- Tap Devices.
- Select the thermostat.
- Tap Settings.
- Tap Remove device.
- Confirm removal.
Factory reset the Nest thermostat (this clears old schedules and helps with ownership transfer)

Even if the previous owner removed it correctly, I still recommend factory resetting so you start fresh.
How to factory reset (Nest Learning Thermostat / Nest Thermostat E)
- Press the thermostat ring to open the menu.
- Go to Settings.
- Select Reset.
- Choose All Settings (factory reset).
- Confirm.
How to factory reset (Nest Thermostat 2020 mirror display)
This model is menu-driven and uses the touch bar.
- Swipe on the right side of the touch bar to open the menu.
- Go to Settings.
- Select Reset.
- Choose Factory reset (or Reset all settings).
- Confirm.
Note: Wording varies slightly by firmware, but you’re looking for the full reset option, not just a schedule reset.
Set it up under your account (the “new owner” setup)
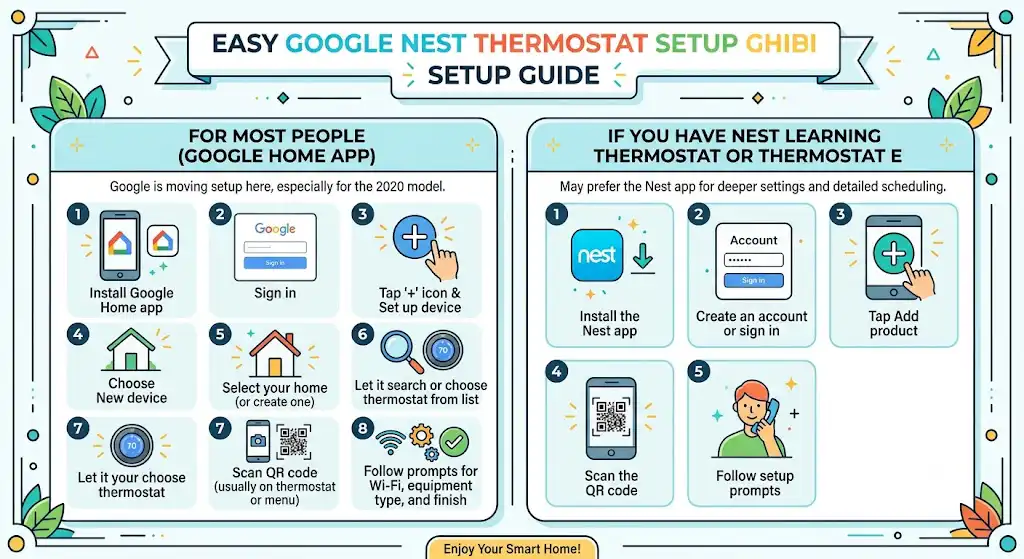
For most people: set it up in the Google Home app.
Google has been moving setup to Google Home, especially for the 2020 Nest Thermostat.
- Install the Google Home app on your phone.
- Sign in with your Google account.
- Tap the plus icon, then Set up device.
- Choose New device.
- Select your home (or create one).
- Let it search for devices or choose the thermostat from the list.
- Scan the QR code (usually on the thermostat or in the menu).
- Follow the prompts to connect to Wi-Fi, set the equipment type, and finish setup.
If you have a Nest Learning Thermostat or Nest Thermostat E
You may still prefer the Nest app for deeper settings and a more detailed schedule interface.
- Install the Nest app.
- Create an account or sign in.
- Tap Add product.
- Scan the QR code.
- Follow setup prompts.
Common problems and fixes (this is what I see most often)
Here’s a troubleshooting table I use mentally when I’m at a house, and the Nest won’t cooperate.
| “This device is already associated with an account” | Previous owner still has it linked in their app | Ask them to remove it from Nest or Google Home, then factory reset again |
| Thermostat asks for a PIN to change settings | A lock was enabled | Ask previous owner for the PIN, or have them remove the lock before transfer |
| You can change temp on the wall but not in the app | App setup not completed or wrong home selected | Confirm you’re in the correct home in Google Home, then re-add device |
| It won’t connect to Wi-Fi after reset | Wrong password, weak signal, router band issue | Move router closer, confirm 2.4 GHz compatibility, restart router and thermostat |
| Heating or cooling runs wrong after reset | Equipment settings or wiring detection issue | Re-check wire labels, run setup again, verify heat pump vs conventional settings |
What if the thermostat is locked with a PIN?
A Nest PIN lock can prevent changes, especially if the previous owner enabled it. In real life, this is one of the biggest transfer problems.
- If you know the previous owner, ask them for the PIN or ask them to remove the lock from their app before removing the device.
- If you do not know them, your best path is still to try a factory reset. If it still demands a PIN or won’t unlink, you’ll need Google Nest Support.
I’m careful here: there is no “legit technician trick” to bypass an ownership lock without proper authorization. If someone claims there is, they’re usually talking about sketchy workarounds that can get your account flagged or fail anyway.
After you take ownership: my recommended settings (comfort plus efficiency)
Once it’s yours, don’t just accept defaults. A couple of adjustments can improve comfort and avoid expensive mistakes.
1) Set a sensible schedule
If you’re home mornings and evenings, you can save money by reducing runtime during work hours.
2) Enable Eco features thoughtfully
Eco can save energy, but if you have pets, sensitive humidity needs, or an older home, you may want less aggressive setbacks.
3) Check Safety Temperature settings
Safety temps help prevent frozen pipes or overheating, especially in vacant homes.
4) Verify heat type during setup
As an HVAC tech, I’ll say this plainly: the most common “Nest is broken” calls I get are actually heat pump settings entered as conventional, or vice versa. Take your time on the equipment questions.
Energy savings stats (what you can realistically expect)
Google Nest has published savings estimates based on usage data. Real-world savings vary depending on insulation, equipment efficiency, rates, and how you use setbacks.
| Nest Learning Thermostat | About 10 to 12 percent on heating and about 15 percent on cooling | Google Nest product data and reports |
| Nest Thermostat (2020) | Savings vary, relies more on user schedules and Eco settings | Google Nest guidance |
My technician take: the thermostat helps most when you previously kept one constant temperature all day, or when your schedule is predictable. If you already manage setbacks well, savings may be smaller.
When you should contact Google Nest Support
Contact support if:
- The thermostat repeatedly says it’s linked to another account even after a factory reset.
- You cannot reach the previous owner and the device won’t transfer
- The thermostat requires a PIN you don’t have, and the reset does not clear it.
Be ready with:
- Thermostat model
- Serial number (usually in Settings or on the back)
- Proof of purchase (if it was bought secondhand)
Frequently asked questions
Will a factory reset remove the previous owner?
Often, yes. A full factory reset clears settings and typically removes account association. But if the device is still registered to the previous owner’s account, you may still be blocked until they remove it from their app.
Can I use the Nest thermostat without the app?
Yes for basic control. You can still adjust the temperature at the thermostat. But for remote control, scheduling convenience, alerts, and Home Away features, you’ll want the app.
Can multiple people control one Nest thermostat?
Yes. You can add household members in the Google Home app so everyone in your home can control it.
My field-tested takeaway
If you want the smoothest transfer, do it in this order:
- The previous owner removes the thermostat from their Nest app or Google Home app.
- You factory reset the thermostat.
- You add it to your Google Home app and finish setup.
References (official)
- Google Nest Support: Remove a device and factory reset guidance (Nest Thermostat help pages)
https://support.google.com/googlenest/answer/9247296?hl=en-GB