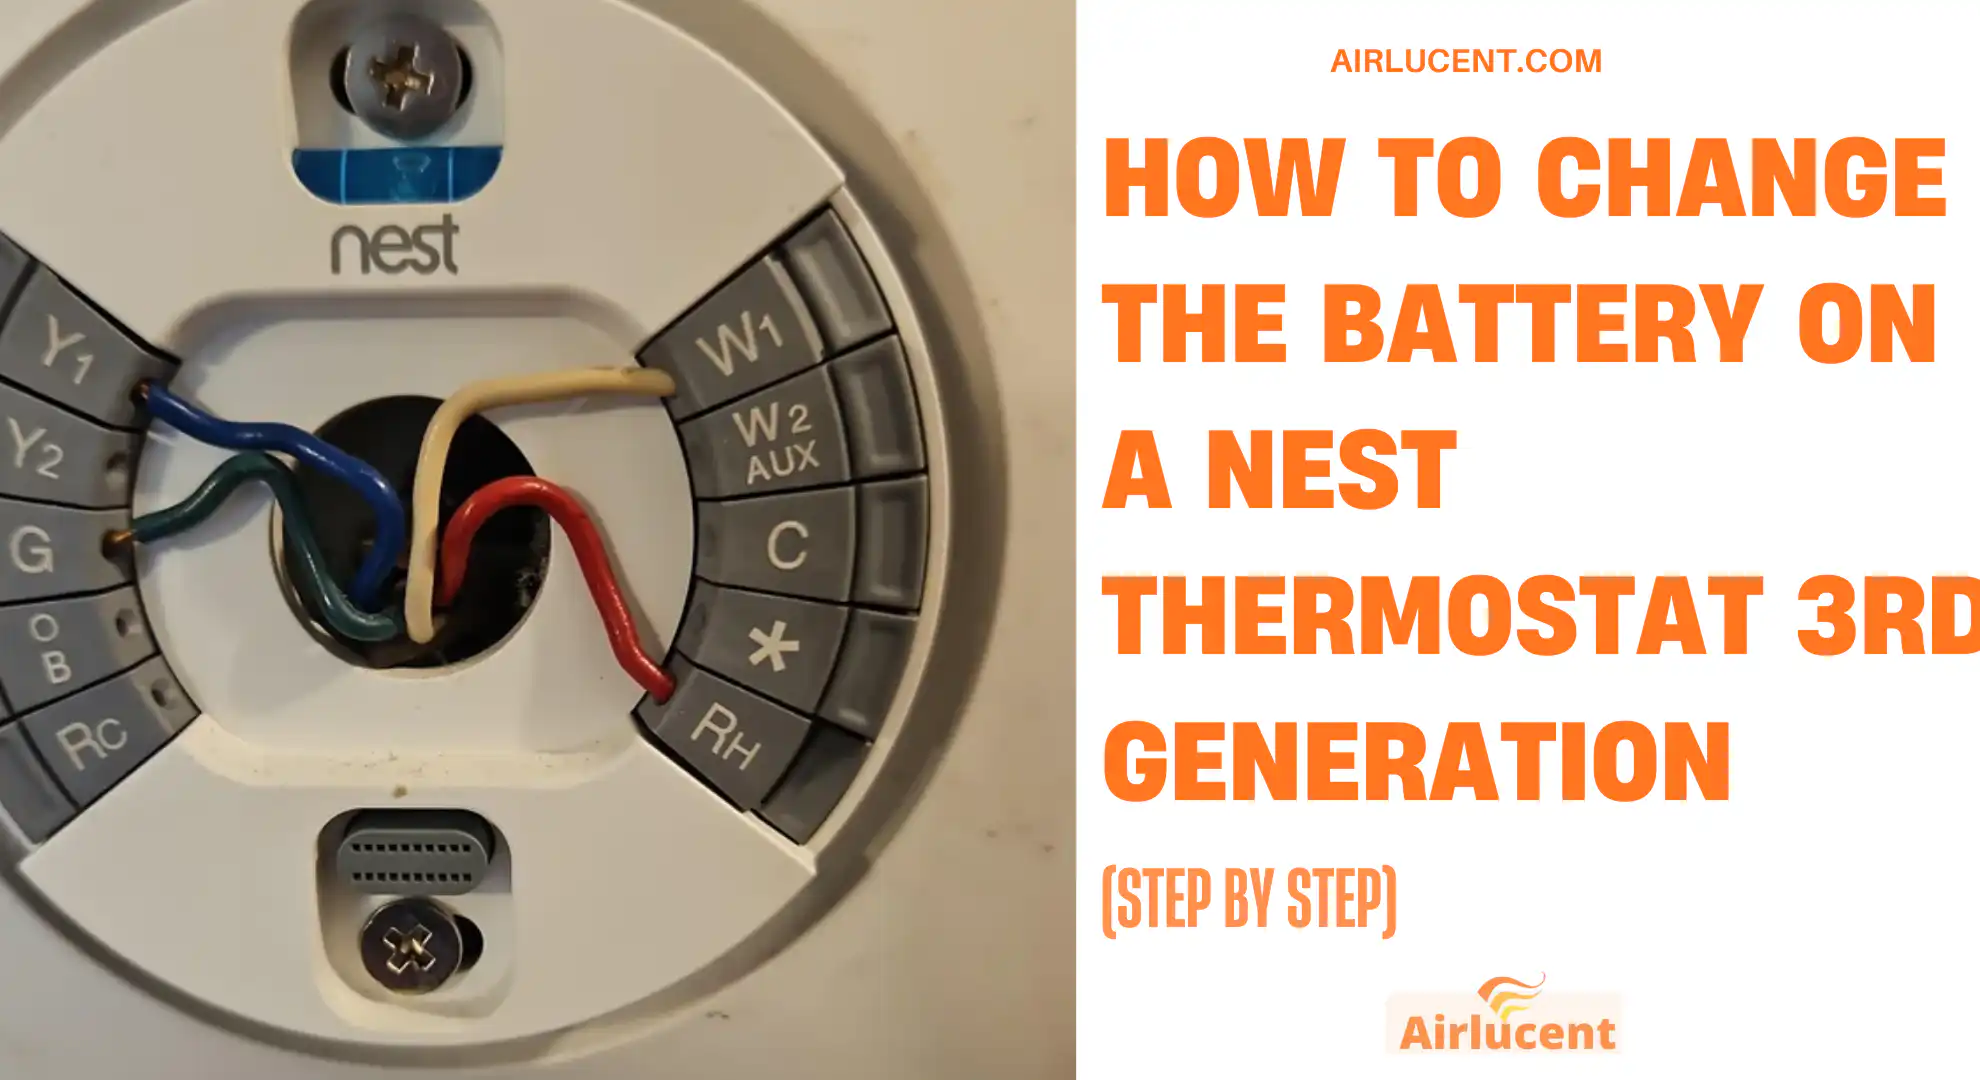
I’m Nathan. I’ve been an HVAC technician for over 10 years, and I’ve installed and troubleshot a lot of Nest Learning Thermostats, especially the 3rd generation. Here’s the most important thing to know up front.
You cannot “swap in” a new battery like you would on a basic thermostat. The Nest Learning Thermostat 3rd gen has an internal rechargeable battery. So when people say “change the battery,” what they usually need is one of these:
- Recharge the thermostat correctly (temporary fix)
- Fix the power supply so it stays charged (the real fix)
- Replace the thermostat if the internal battery no longer holds a charge
This guide walks you through all three in a clear, homeowner friendly way.
- Quick answer
- Confirm you have a Nest Learning Thermostat 3rd generation
- Why your Nest 3rd gen says Battery Low
- What battery level is considered low on Nest 3rd gen
- Safety first
- How to recharge the Nest Thermostat 3rd gen battery (the correct way)
- If the battery dies again, here is the real fix
- Check your wiring at the thermostat
- The best permanent fix option 1: Add or connect a C wire
- The best permanent fix option 2: Install a Nest Power Connector
- Backup option: Use a dedicated 24 V transformer
- Will your heat still run if the Nest battery is low
- How to know if your Nest battery is actually failing
- Troubleshooting table
- My recommended homeowner checklist
- FAQs
- Can I replace the battery inside a Nest Learning Thermostat 3rd gen
- Why does my Nest work for a few hours after charging, then dies again
- I have W1, Rh, G, and Y1 only. Do I have a C wire
- If I buy a new Nest, will it fix it
- When to call a pro
- Final takeaway
Quick answer
- Nest Learning Thermostat 3rd gen does not use replaceable batteries
- To “change the battery,” you recharge the display with a micro USB cable for about 1 hour
- If it keeps dying, you almost always need a C wire or a Nest Power Connector so the thermostat gets steady power
Confirm you have a Nest Learning Thermostat 3rd generation
This article is for the Nest Learning Thermostat 3rd gen (the round metal ring style). It charges using micro USB on the back of the display.
If your thermostat uses AAA batteries, that is the Nest Thermostat 2020, not the 3rd gen Learning Thermostat.
Why your Nest 3rd gen says Battery Low
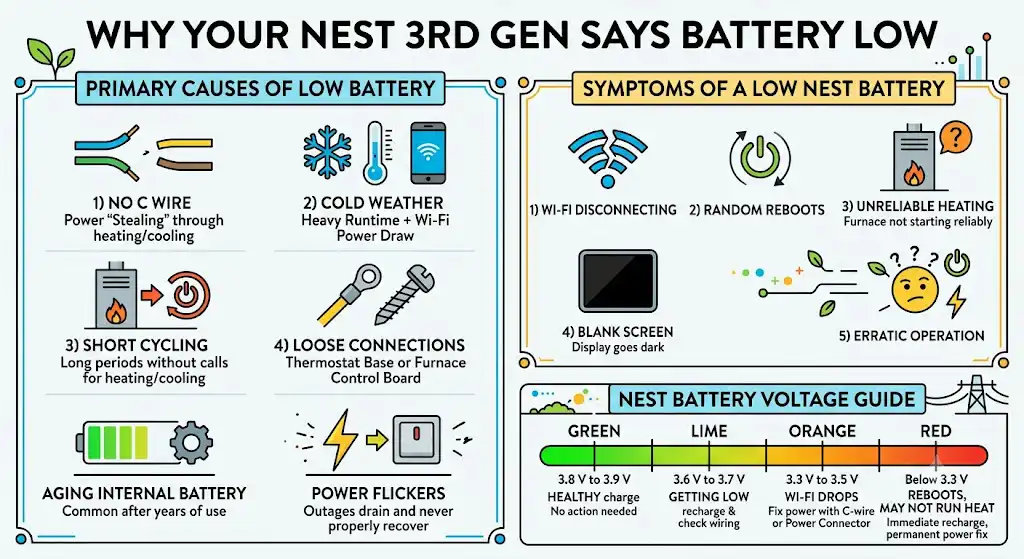
From what I see in the field, “Battery Low” usually happens for one of these reasons:
- No C wire (the thermostat is trying to “steal” power through the heating or cooling circuits)
- Cold weather heavy runtime plus Wi Fi power draw
- Short cycling or long periods without a call for heating or cooling
- Loose connections at the thermostat base or furnace control board
- Aging internal battery (common after years of use)
- Power flickers or outages that drain the battery and it never properly recovers
A low Nest battery can also cause weird symptoms like:
- Wi Fi disconnecting
- Thermostat rebooting randomly
- Furnace not starting reliably
- Screen going blank
What battery level is considered low on Nest 3rd gen
Nest lets you view battery status in the thermostat menu. In my experience, these ranges are a good practical guide.
Nest battery voltage guide (real world troubleshooting)
| Around 3.8 V to 3.9 V | Normal healthy charge | No action needed |
| Around 3.6 V to 3.7 V | Getting low, may start acting up | Recharge and check wiring |
| Around 3.3 V to 3.5 V | Common range where Wi Fi drops | Recharge, then fix power with C wire or Power Connector |
| Below about 3.3 V | Often reboots, may not run heat reliably | Immediate recharge, then permanent power fix |
Safety first
You can recharge the Nest display without touching HVAC wiring.
But if you’re going to check wires at the thermostat base or inside your furnace or air handler, do this:
- Turn off HVAC power at the breaker or service switch
- Confirm the system is off before touching terminals
- If you are not comfortable working near low voltage control wiring, stop and call a pro
How to recharge the Nest Thermostat 3rd gen battery (the correct way)
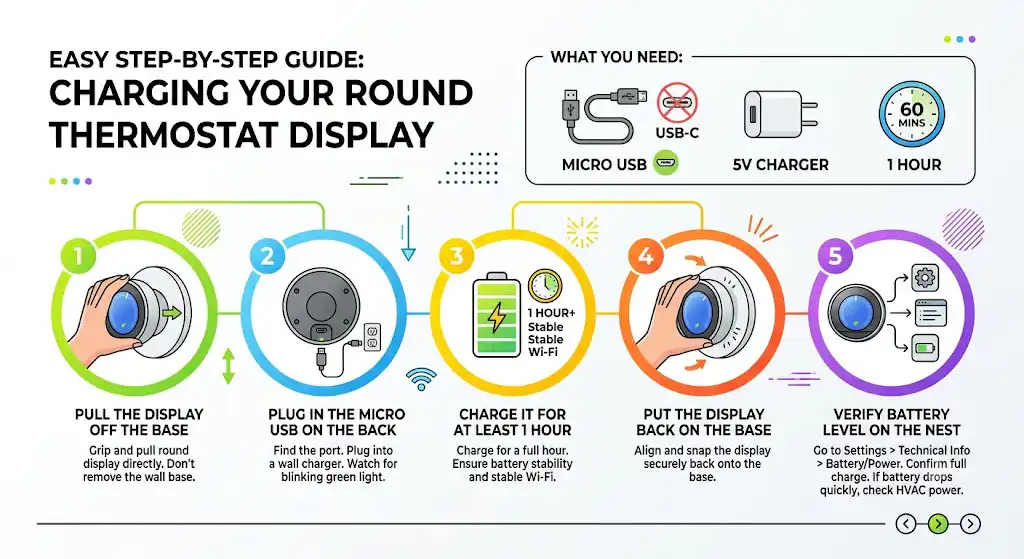
What you need
- Micro USB cable (not USB C)
- USB wall adapter (I recommend a basic 5 V phone charger)
- About 60 minutes
1. Pull the display off the base
Grip the thermostat and pull straight toward you. The display pops off.
Do not remove the base from the wall. You only need to remove the round display.
2. Plug in the micro USB on the back
On the back of the display, you’ll see the micro USB port.
Plug it into a wall charger. When it’s charging, you should typically see a blinking green light.
3. Charge it for at least 1 hour
A quick 10 minute charge can get the screen back, but it often will not keep Wi Fi stable.
For a real test, I tell homeowners to charge for a full hour.
4. Put the display back on the base
Snap it back onto the wall base.
5. Verify battery level on the Nest
On the thermostat:
- Go to Settings
- Go to Technical Info
- Look for Battery or Power
If it charges up but drops again within hours or a day, that is your sign the thermostat is not getting steady power from the HVAC system.
If the battery dies again, here is the real fix
Nest 3rd gen needs continuous power, ideally from a C wire
The Nest can sometimes run without a C wire by stealing power, but it is not equally reliable in every home. Some run for years, others start failing during cold snaps, mild weather, or after equipment changes.
If you are recharging with USB repeatedly, you are treating the symptom, not the cause.
Check your wiring at the thermostat
Pull the display off again and look at the wire labels on the base.
Common Nest terminals
| R or Rh or Rc | Red | Power from transformer |
| C | Often blue or brown | Common wire, continuous return path |
| W or W1 | White | Heat call |
| Y or Y1 | Yellow or sometimes blue | Cooling call |
| G | Green | Fan |
Important: wire colors are not guaranteed. I’ve seen installers use blue for Y and keep the actual C wire tucked back unused. Always confirm at the furnace control board if possible.
If you do not see a wire in C
That is the most common reason a Nest 3rd gen keeps going low.
The best permanent fix option 1: Add or connect a C wire
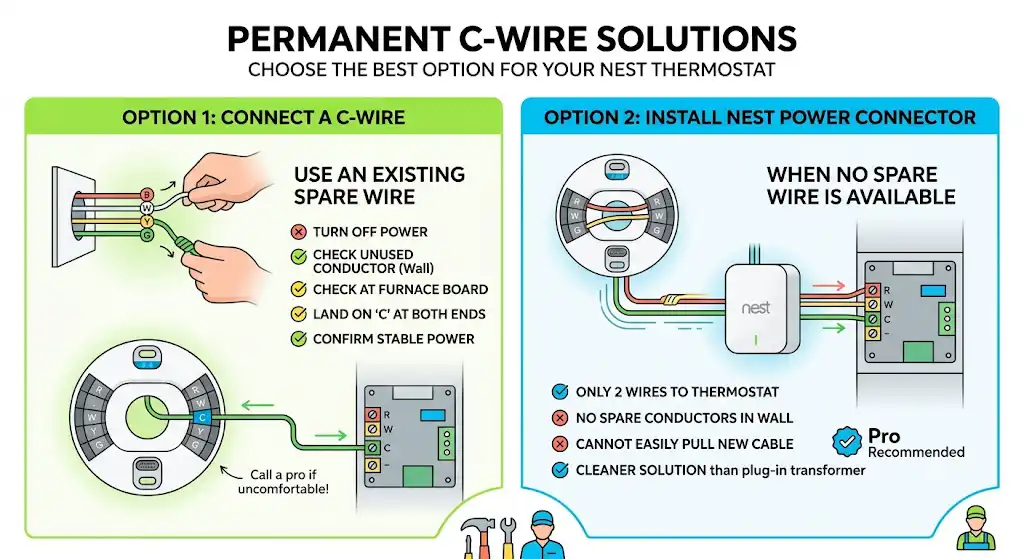
In a lot of homes, there is an extra unused wire in the thermostat cable tucked behind the wall.
What I do on service calls
- Turn off power to the furnace or air handler
- Check if there is an unused conductor behind the thermostat
- Check the same cable at the furnace control board
- Land that unused conductor on C at both ends
- Confirm stable power readings afterward
How to tell if you have an extra wire
At the thermostat, gently pull the wire bundle out of the wall a bit. If you see extra wires wrapped around the sheath and not connected, that is your opportunity.
Where C connects at the furnace or air handler
Inside the unit, you’ll usually find a low voltage control board with terminals like:
- R
- C
- W
- Y
- G
You connect the chosen spare conductor to the C terminal there, and the same conductor to C on the Nest base.
If you are not comfortable opening the unit, that’s a good time to call an HVAC tech. This is usually a quick fix for us when the wiring is accessible.
The best permanent fix option 2: Install a Nest Power Connector
If you do not have an extra wire available, the next best option is the Nest Power Connector (sometimes people call it a C wire adapter).
This device helps provide the Nest a more stable power setup using the existing wires, without needing to run a new thermostat cable through finished walls.
When I recommend the Power Connector
- Only 2 wires to the thermostat
- No spare conductors in the wall
- You cannot easily pull a new cable
- You want a cleaner solution than a plug in transformer
This typically installs at the furnace control board. If wiring makes you nervous, this is a great “hire it out” job because a tech can usually install it quickly and verify everything.
Backup option: Use a dedicated 24 V transformer
Some homeowners use a plug in 24 VAC transformer and run two small wires to Rc and C.
This can work, but I treat it as a last resort because:
- It must be wired correctly to avoid damaging equipment
- Wire routing can look messy
- You still want to avoid creating a wiring conflict with your existing R wire
If you go this route, I strongly recommend having a technician verify it.
Will your heat still run if the Nest battery is low
This depends on how low it is and how your system is wired.
In many cases, the system may still run for a while, but here’s the risk:
- As the battery drops, the Nest may shut off Wi Fi first
- Then it may reboot randomly
- Eventually, it may not reliably call for heat
If you are trying to “get through the night,” I tell homeowners this:
- Recharge the display for a full hour
- Keep the thermostat mounted firmly on the base
- If your home is at risk of freezing temperatures, consider a temporary backup plan like a safe space heater setup and keep doors open to plumbing areas
How to know if your Nest battery is actually failing
Sometimes the wiring is fine and the internal battery has simply aged.
Signs the internal battery may be worn out
- You charge it for an hour and it drops back to low within hours even with a C wire connected
- Battery voltage will not climb to a normal range even after charging
- It has been in service for many years and started failing recently with no wiring changes
At that point, replacement may be the practical answer.
Troubleshooting table
Battery low causes and fixes that actually work
| Battery low after a power flicker | Battery drained and never recovered | Recharge for 1 hour, then confirm C wire power |
| Works in summer, dies in winter | No C wire, higher demand and Wi Fi use | Add C wire or Nest Power Connector |
| Wi Fi drops first, then battery warning | Battery voltage dipping under load | Add C wire, check connections, recharge |
| Needs USB charging every few days | Power stealing not enough | Add C wire or Power Connector |
| Battery never holds charge even with C wire | Aging internal battery | Replace thermostat |
My recommended homeowner checklist
If you want the fastest path to a real solution, follow this order.
- Recharge with micro USB for 1 hour
- Confirm the battery voltage in Technical Info
- Check if C is connected at the thermostat
- If no C, look for an unused wire in the wall
- If you have a spare wire, connect it to C at thermostat and furnace board
- If no spare wire, install a Nest Power Connector
- If it still won’t hold a charge after proper power is provided, replace the thermostat
FAQs
Can I replace the battery inside a Nest Learning Thermostat 3rd gen
Not in any normal homeowner friendly way. It is an internal rechargeable battery and Google’s guidance is to recharge the display, not replace a removable battery.
Why does my Nest work for a few hours after charging, then dies again
That’s the classic sign of missing continuous power, usually no C wire. The USB charge gives it a temporary boost, but the system is not keeping it topped up.
I have W1, Rh, G, and Y1 only. Do I have a C wire
Not currently connected. You would need to see if there is an extra unused wire in the bundle, or check if a wire could be repurposed, or install a Power Connector.
If I buy a new Nest, will it fix it
If the root issue is no C wire, a new thermostat will likely do the same thing eventually. You might get lucky for a while, but the reliable fix is providing steady power.
When to call a pro
As an HVAC tech, here’s when I think it makes sense to bring someone in:
- You cannot identify wiring at the furnace control board
- You have a multi stage system, heat pump, boiler, or zoning and you are not sure what you’re looking at
- You suspect the transformer is weak or failing
- You want a Nest Power Connector installed cleanly and tested properly
Most of the time, this is a straightforward service call, and it prevents you from repeatedly charging a thermostat all winter.
Final takeaway
If you came here searching “how to change battery on Nest thermostat 3rd generation,” the honest answer is:
You don’t replace batteries on the Nest Learning Thermostat 3rd gen. You recharge it with micro USB, and if Battery Low keeps coming back, you fix the power issue by adding a C wire or installing a Nest Power Connector. That is what makes the problem go away long term.