This guide will provide everything you need to know about the Honeywell rth9585wf wiring diagrams for heat pumps or conventional heating (furnaces and air conditioners).
Before you start wiring your thermostat, there are a few things that you need to keep in mind such as the type of system that you are dealing with. Wiring on a heat pump will typically differ from the wiring on a conventional system.

That said, if you are wiring a heat pump system, you should also know what type of heat pump you have because wiring on a 1st stage heat pump system will not be the same as the wiring that is going on a 2-stage system.
In this guide, we are going to be looking at the wiring on these types of systems mentioned above. It’s also worth mentioning that there is no standard on what each color the wire stands for. So to help you with your wiring, below are the roles for each wire in your system.
- Aux / W2 – Heat Stage 2 (Heating)
- C – Common
- E – Emergency Heat
- G – Fan
- L/A – A – Input for heat pump fault
- O/B – Reversing valve for Heat Pump systems
- R – 24vac (Heating transformer)
- Rc – 24vac (Cooling transformer)
- S – Indoor and Outdoor Wired Sensors
- U – Humidifier, Dehumidifier, or Ventilator control
- W – Heat Stage 1 (Heating)
- Y – Compressor Stage 1 (Cooling)
- Y2 – Compressor Stage 2 (Cooling)
Honeywell rth9585wf wiring diagram for conventional heating
Let’s start with the wiring diagram for conventional heating. But before you start wiring your thermostat, ensure that power to your HVAC system is turned off.
And most importantly the Honeywell rth9585wf model does require the c wire. You might have noticed this if you are replacing one of the older models that use a battery and don’t have the c wire.
The c-wire is important because it supplies your thermostat with 24v power.
A conventional heating system will typically have 5 wires that you need to wiring as follows:
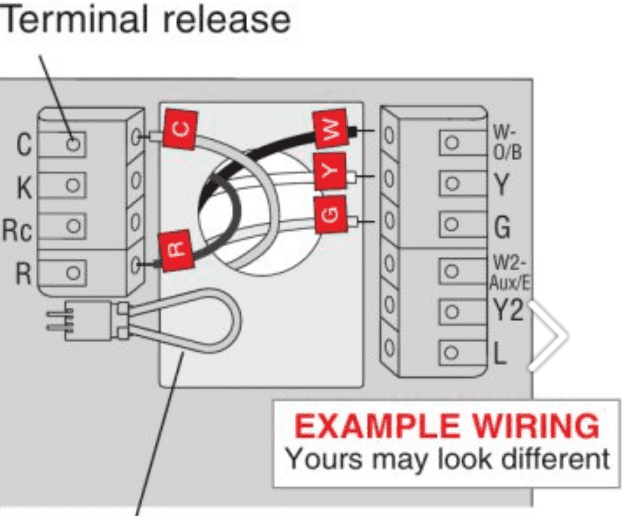
Honeywell rth9585wf wiring diagram definitions:
R————the R terminal
C———-the C terminal
G——–G terminal
W——-the W-O/B
Y——-Y terminal
Important! I identify all wires coming from the control board, you should have 1 or 2 of the R, RC RH terminals. If you just have one of these, it should go in the R terminal. Then set a jumper between the R and RC terminal.
However, if you have two wires, attach RH or R into the R terminal and RC wire into the RC terminal.
Alternative wiring for a conventional system
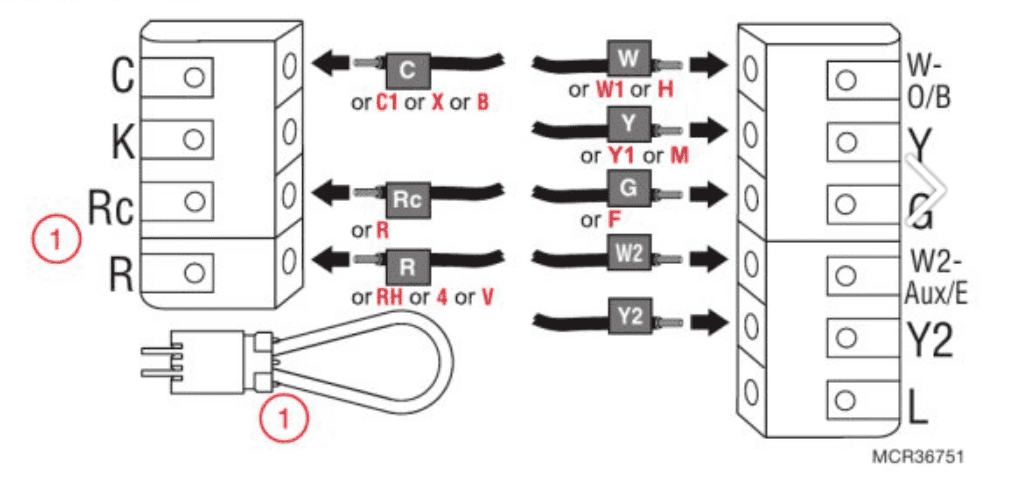
- C1, X or B go into the C terminal
- W1 or H into the W terminal
- Y1 or M in into the Y terminal
- F into the G terminal
- RH,4, or V into the R terminal
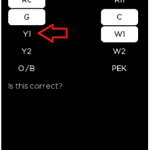
Honeywell rth9585wf heat pump wiring diagram
Let’s now look at the Honeywell rth9585wf wiring diagram for a heat pump. The wires can be 6 or more depending on the type of system you have. Here are the wires and the respective terminals where they should go.
rth9585wf wiring diagram for heat pump definitions:
R———–R
C———-C
G———-G
Y———-Y
O———-W/OB
AUX——–W2-AUX/E
Important: If you have the RC and R wires, then disconnected the jumper loop
Other ways to wire your rth9585wf for the heat pump
- If you don’t see the wire given above but have different wires, here are alternative ways to wire your thermostat to the heat pump.
- If your old thermostat had the R and RH wires, connect the R wire to the RC terminal and the RH wire to the R terminal.
- If the old thermostat had separate wires for AUX and E, nut the two wires into one and slide this third wire into the W2-AUX/E terminal
- If the old thermostat had two separate wires for O and B, attach B B wire to the common wire and slide this in the c terminal
Alternative wiring if labels and terminals do not match:
- If you have V or VR wire, this should go in to the R terminal
- If you have the X, X2, W, W1, W2, these should go into the W2-AUX/E terminal
- F into the G or L terminal
- Y1 or M into the Y terminal
Conclusion
I hope that you have managed to wire your rth9585wf thermostat correctly and that your heat pump or furnace is working accordingly. If you have any problems with the wiring of your thermostat or you are not comfortable working with electrical components, it’s always best to call professionals for help.